Capture locally
Continue editing supported assessment details on the device.
Move room by room with one connected field record—samples, readings, photos, annotations, lab files, reviewed AI content, and the final report stay attached to the work that produced them.
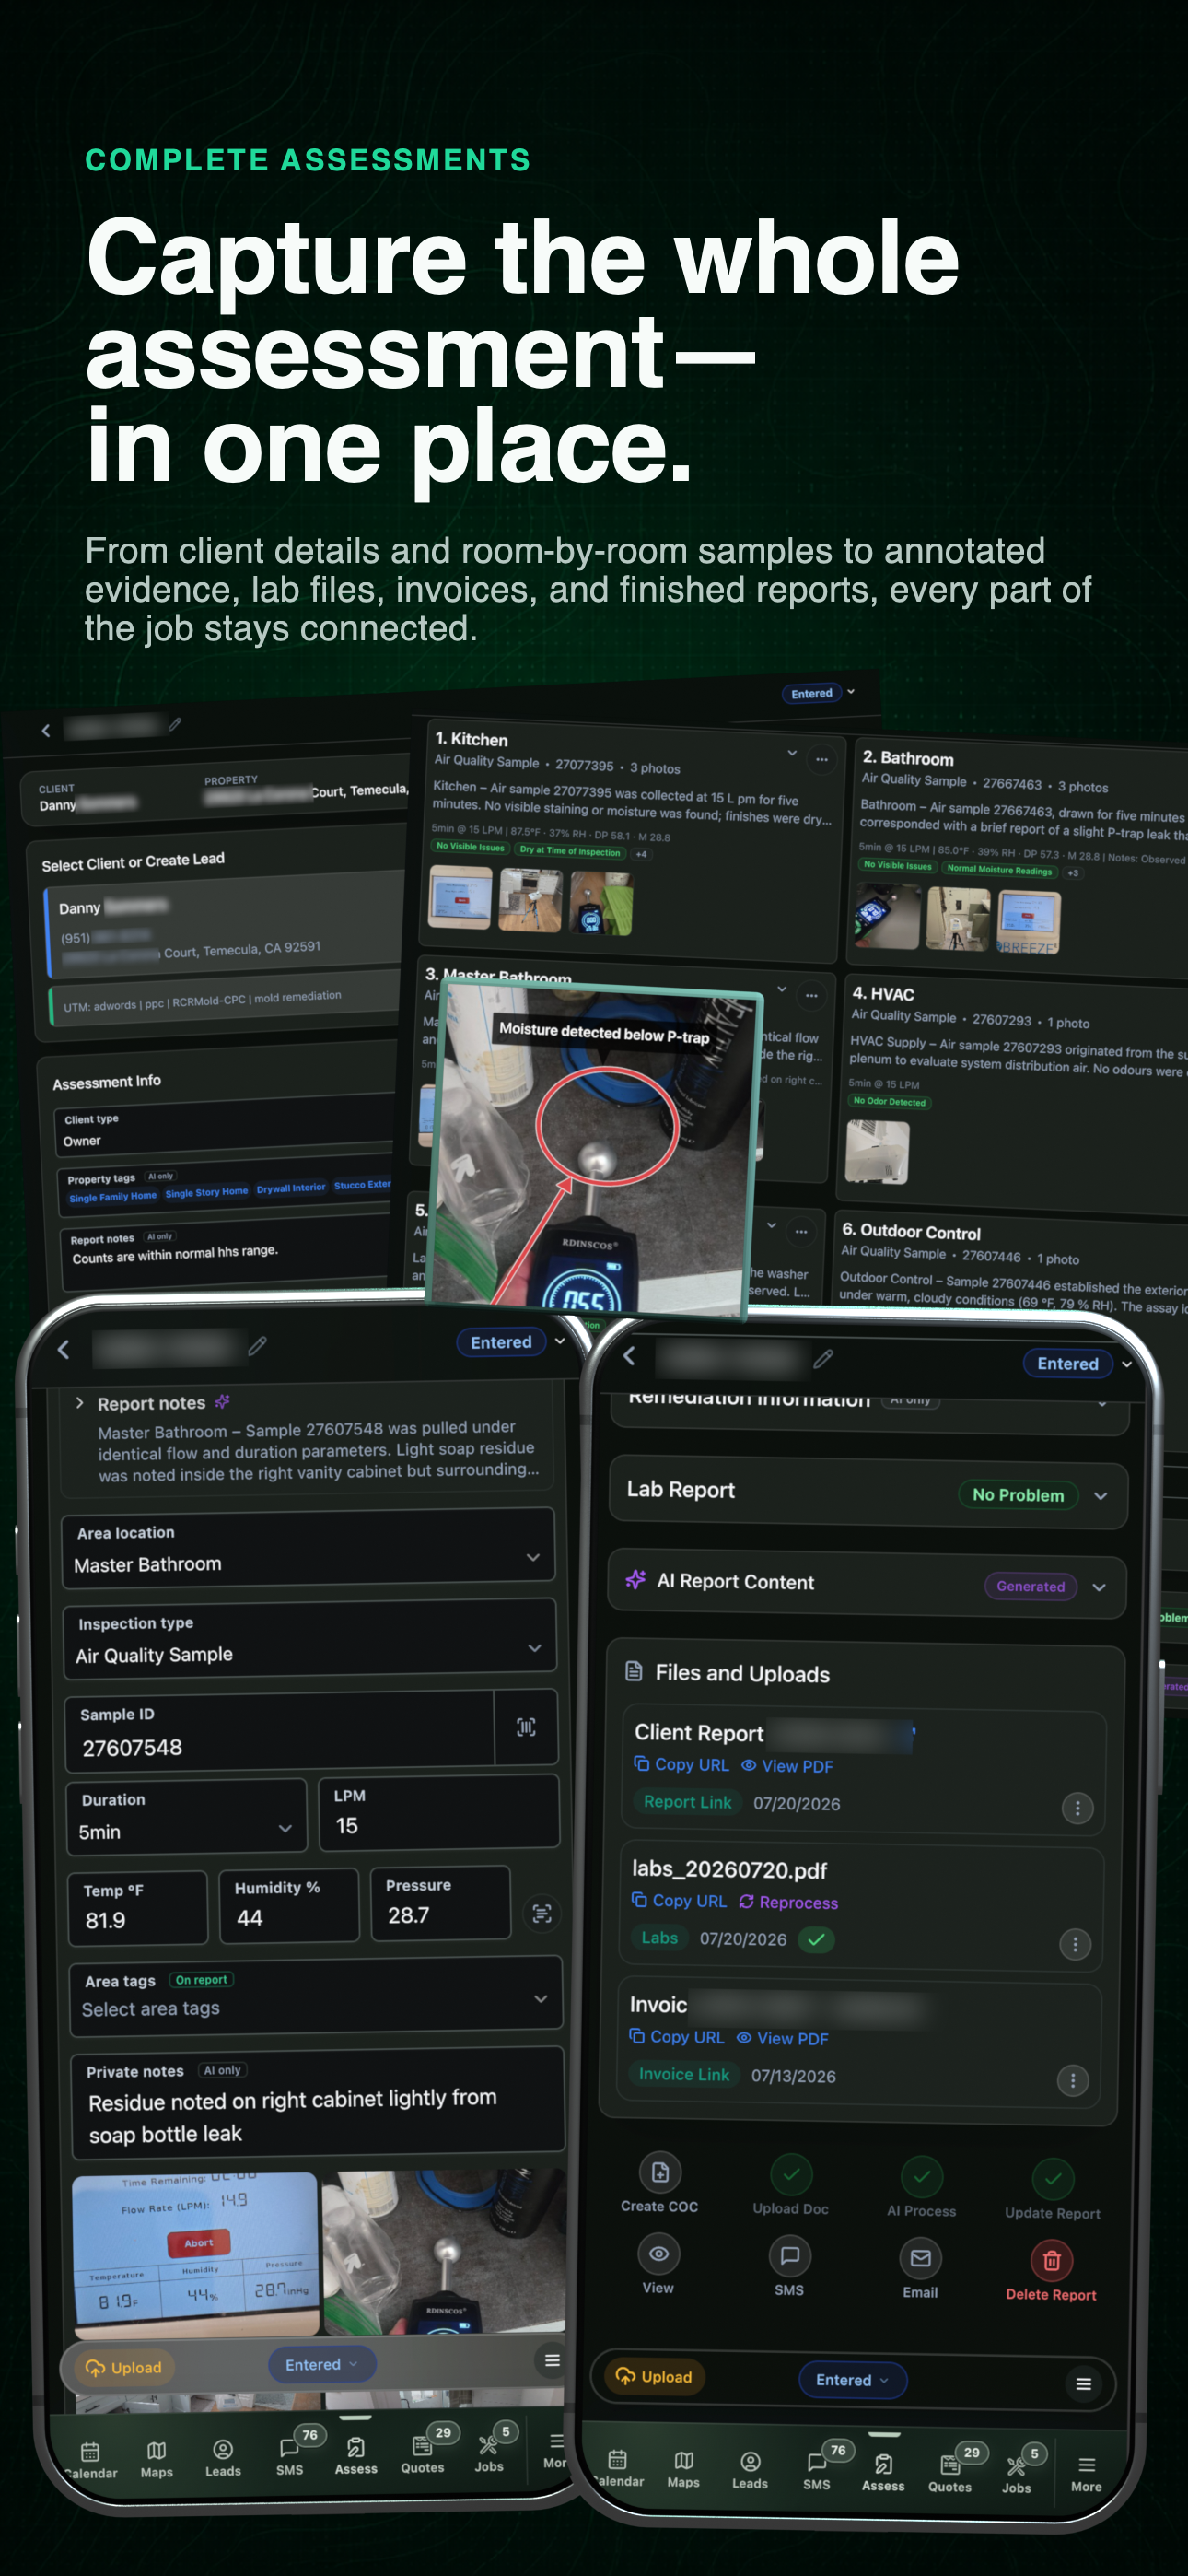
Complete field-to-report workflow
Capture the property on site, match the lab return, review the narrative, and hand off the finished report without rebuilding the record.
Watch an assessment take shape
Here’s what entering an area looks like on site. Scan the sample barcode, photograph the meter, choose the area tags, and keep the photos with the record.
One assessment, six connected stages
Follow the same record from the first area captured on site to the report delivered to the client.
Field → lab → report
01 / Fast field capture
Give every room or test location its own area. Record the inspection type, sample ID, collection settings, environmental readings, notes, tags, and photos in one pass from the phone.
Use the left and right arrow keys to change screenshots. On a touch screen, swipe horizontally. Activate a screenshot to open its expanded view.
The current mobile record keeps every area, sample type, sample ID, field summary, reading, and photo together.
1 / 1
Scroll through the workflow
1 views
Mobile workflow
01 / 01
Tap any view to expand it, then use the controls or swipe between the full-screen screens.
Use the left and right arrow keys to change screenshots. On a touch screen, swipe horizontally. Activate a screenshot to open its expanded view.
Review the field image, annotate the condition, scan supported readings, or add notes without leaving the current assessment.
1 / 1
Swipe to view
1 / 1
02 / Samples and visual evidence
Scan a sample barcode with the camera or enter the ID manually. Add photos from the camera or gallery, then mark the exact condition with arrows, shapes, labels, notes, and image tags that stay with that area.
Evidence stays attached to context.
The photo, annotation, area notes, and sample identity travel together instead of becoming separate files the office has to reconcile later.
03 / Offline-ready field work
Offline mode saves supported assessment fields to local device storage. When the connection returns, queued changes sync back to the assessment while protected area and photo fields remain guarded against an older background save overwriting newer evidence.
Continue editing supported assessment details on the device.
The app detects the connection and checks for unsynced assessment changes.
Queued fields return to the server without replacing protected photo and area data.
Use the left and right arrow keys to change screenshots. On a touch screen, swipe horizontally. Activate a screenshot to open its expanded view.
Keep the carrier label, ship date, notes, and assessment associations together before the lab file returns.
1 / 1
Swipe to view
1 / 1
04 / Lab import and matching
Keep chain-of-custody and shipment context attached to the assessment, then upload the returned lab document or add structured lab data. Matching starts with the strongest evidence—the sample ID—and falls back to normalized area and sample-type context.
Upload the lab document or add structured lab data to the assessment.
Match exact sample IDs first, then compare normalized area names and sample types.
Re-run matching or move an unresolved sample to the correct area before reporting.
05 / Reviewable AI report content
Use the assessment, area evidence, and imported lab data to draft property context, service details, recommendations, and area analysis. Expand, edit, clean up, lock, or reprocess each section before it becomes part of the client report.
Generated
Start from the recorded field and lab data
Reviewable
Edit individual sections before delivery
Lockable
Protect approved writing from regeneration
Use the left and right arrow keys to change screenshots. On a touch screen, swipe horizontally. Activate a screenshot to open its expanded view.
Confirm the 4/4 sample match, review generated report content, and keep the client report, COC, and lab file in one record.
1 / 1
Swipe to view
1 / 1
Use the left and right arrow keys to change screenshots. On a touch screen, swipe horizontally. Activate a screenshot to open its expanded view.
The finished report keeps the analysis method, complete control, and finding status readable on a client’s phone.
1 / 1
Swipe to view
1 / 1
Use the left and right arrow keys to change screenshots. On a touch screen, swipe horizontally. Activate a screenshot to open its expanded view.
A finding-specific glossary explains the detected organisms and preserves the assessment locations tied to each one.
1 / 1
Swipe to view
1 / 1
06 / Files and report handoff
Keep the client report, lab file, chain-of-custody document, shipping label, and related uploads under the assessment. The final handoff can be viewed online, printed to PDF, texted, or emailed from the same record.
Tell us how you work today. We’ll walk through the calls, fieldwork, and reports that matter to your team.
0130-minute personalized walkthrough
02See pricing for your team size
03No obligations or pressure